Sunday, February 19, 2017

3 Sisters Garden - Recap

With the season over and taking time to reflect on the 3 Sisters Garden project, I would put it in the "win" column!

My most successful piece was the Cherokee Long Ear corn.  This was the first time I had attempted to grow corn of any type. It was very rewarding for me.  Since I don't have the space to grow enough corn for my family of five to eat fresh, flint corn is definitely a good choice. I will be growing this again.

Beautiful!!

I removed kernels from ears
that weren't fully developed.

Opening each ear at the end of the season was like opening a little present finding out what color was inside. I had some beautiful, decorative corn to use as decorations through the fall and Thanksgiving.  I gave several bundles as gifts to close friends and family, along with a gourd or two that grew from my "mystery" plant.  Much of the corn from this plot was removed from the cob and used for pop corn.  It made for some beautiful and very tasty snacks.  I hadn't realized how much the taste of popcorn changed over the years until I tasted this I raised myself. 

Ground Kernels and Cornbread


When I chose this corn, I knew I wanted to use some of  it to grind and make cornbread.  I like to have as much of my Thanksgiving dinner grown and homemade as possible. This cornbread was, by far, my most ambitious project for the table.  The multiple colors of the corn kernels made for a beautiful one-of-a-kind cornbread.  


The beans grew up the corn as they were supposed to and did quite well.  It was a fun challenge to duck in between the stalks of corn and over the vines to collect these beans.  We wanted to eat them fresh, but leaving them on to dry would most likely be the better choice.  While I was away one long weekend, the bean beatles came in and defoliated many of them before my return.  At that point,  I left the remaining beans in the garden to dry on the vines. 

Rattlesnake beans with beautiful purple striping, growing on the corn.

The squash, on the other hand, did not fair so well.  Perhaps it was too much shade from the stalks being close, the tree on the edge of the garden that created more shade than I realized, or the devastating squash bugs. I did get some gourds from that "mystery" spot, and a few small squash from the southern edge of the plot.  

3 Sisters Garden during growing.

I love trying something new in my garden each year.  This was an incredible project and one I look forward to doing again.  I have decided that flint corn will be something incorporated into my garden spaces on a regular basis for decorations, gifting and fresh popcorn.  

I have mason jars of "seeds" from this crop, corn kernels and dried beans, saved to plant next time which is another lesson from our past - self-reliance.

I hope I have inspired you to try the "3 Sisters Garden" or, at the least, to simply try and experiment with something new.

--Alison

Friday, July 3, 2015

3 Sisters Garden Planting

This was the year I decided to delve into a little "history gardening". 

In my yard, each new garden season brings with it some type of new project or planting experiment. I have long been intrigued by the Native American, and subsequently early colonist's, planting of the "3 Sisters" -corn, pole beans, and squash.  


The contents: "Indian" Corn, Pole Beans, Winter Squash

I wanted a dried corn that I can use. I purchased an heirloom corn, Cherokee Long Ear Popcorn, which will be ornamental, can be used for popping, or ground for corn flour. Since I bake my own bread, this was a plus. For beans, I chose three pole beans I had prior experience with: Rattlesnake, purple, and yellow Kentucky Wonder.  I personally use each of these as a fresh eating bean, but you can allow for them to dry on the vine for use as a dried bean. Last, for the squash, I chose several winter squash varieties for long term storage: Acorn, spaghetti, Long Island Cheese, Delicata, longneck, butternut, and one hybrid, Sugar Dumpling.


The Planting:

Next, I did some research on how to plant.  I found an article written by RenĂ©es Garden that explains simply how to layout and plant as well as some history behind the three sisters garden.  This is the plan I followed.

I chose my area and used a marked string to center my holes on.  Using a 5 gallon bucket, I made the outline for each hill, and placed a couple handfuls of compost on top of each one. This made it easier to see as well as was a great starter for the seeds.
A marked string & 5 gallon bucket made outlines for the planting hills
When all the outlines were completed, I went back and made hills around the outside leaving the inner compost as a depression in the middle.  This made a little "bowl" to help retain water.
Completed hills with center of compost for seed planting
The first item to be planted is corn, so 4 corn per every-other mound was planted. I had one volunteer squash from last year that just so happened to be In the middle of a hill.  I decided to leave that in place.
"Volunteer" squash was left in place
The corn planting was actually followed 1 week later with the squash seeds planted in the other hills. This is sooner than called for in the plans, but I was already late in my plantings and wanted to get things started.  I did follow the recommendation of waiting for the corn to be 4" tall prior to planting bean seeds.


Growing:

I did keep a pretty constant eye on the progress. Two hills of squash did not germinate and had to be re-seeded. I also discovered while young, the corn tended to blow over in the storms we experienced and had to be uprighted and reinforced with some soil. Next, as the beans grew, I made sure they were climbing the corn vs. rambling the ground. Simply "wrap" the end gently around a cornstalk.
Beans climbing up the corn, squash between


Overview of entire planted area - Late June
So far, so good in this garden experiment. I feel a connection to history through this process. Due to time and "supply", I did leave out one "authentic" item in this planting (as my children pointed out)...I did not bury a fish in each hill. I originally planned on doing this but my fishing and garden timing were not in sync. Furthermore, our ancestors did not have spigots nearby and watered everything by hand.  I did this in the early phase when I watered the seeded hills daily, leaving the surrounding soil dry.

Follow me on Twitter @AlisonRolen, where I will continue to post progress on this and more.

--Alison

Monday, June 1, 2015

Growing Now - May 31


I would like to thank Beth at More Than Oregano for hosting GrowNow2015. My participation in this event slows me down and gets me out in the garden with an eye and appreciation for what is happening, blooming, and budding versus just what more needs to be done. There is miraculous beauty all around and I've been too busy lately to enjoy it.

In Bloom:

Mexican Evening Primrose - stealing the show right now in the garden.
Growing around entire driveway island perimeter (below)
Driveway Island
Newly planted Jalapenos are tucked between Sedum & Primrose
continuing around entire perimeter
Shrub Roses just coming into bloom.
Coral Bells
Waterfall garden
Coral Bells - Japanese Iris
Wild Honeysuckle
The air is thick with their fragrance
Lambs Ears
They will soon be filled with bees

In the Veggie Garden:

Ruby and Neon Glow Swiss Chard
Almost time to begin light picking
Garden Babies
Baby loose head lettuce
Red Sails
My personal favorite lettuce
Yellow squash seedlings
From this week's planting
---Alison


Grow Now Logo smWelcome to the GrowNow2015 Garden Tour. I hope you take the time to check out what's growing...or, better yet, join in with your own garden tour. Click on icons below to Tour or "Hop" over to view what's growing elsewhere.

What are you Growing?

If you would like to participate as well, click on the text below that says, "You are next." Follow the directions to link-up your post and share it along with the rest of us.  If you would like to show the entries on your own blog, after you've linked up, click "Get the code" and follow directions there.

Thursday, May 21, 2015

Alison's Garden Tour - May 2015

Here is a brief tour of what's growing and blooming in my yard currently.  I am behind so far this year compared to where I usually am.  One too many spring projects.  
100+ yr. old Peonies - so very fragrant
seen with hardy geranium
These Peonies were given to me 28 years ago by my Mother in law.  They came from her grandmother.  I have another type as well, however they do not smell nearly as good. One of these blooms can fill a room with it's fragrance.  I keep one by my bedside.
Honeysuckle Vine
I have two of these climbers.  One alongside my house climbing a home-made trellis, another climbs up and around my bird feeder platform.
Red Knockout rose - from bush below

This red Knockout rose is huge.  I neglected to prune it back this year, so it is even larger than anticipated.  Behind it is a 4' fence and a bluebird nesting box (with babies).
One of many Iris, others have bloomed and are done.
Stella d'Oro - budding out
Blueberries.  New addition for 2015.
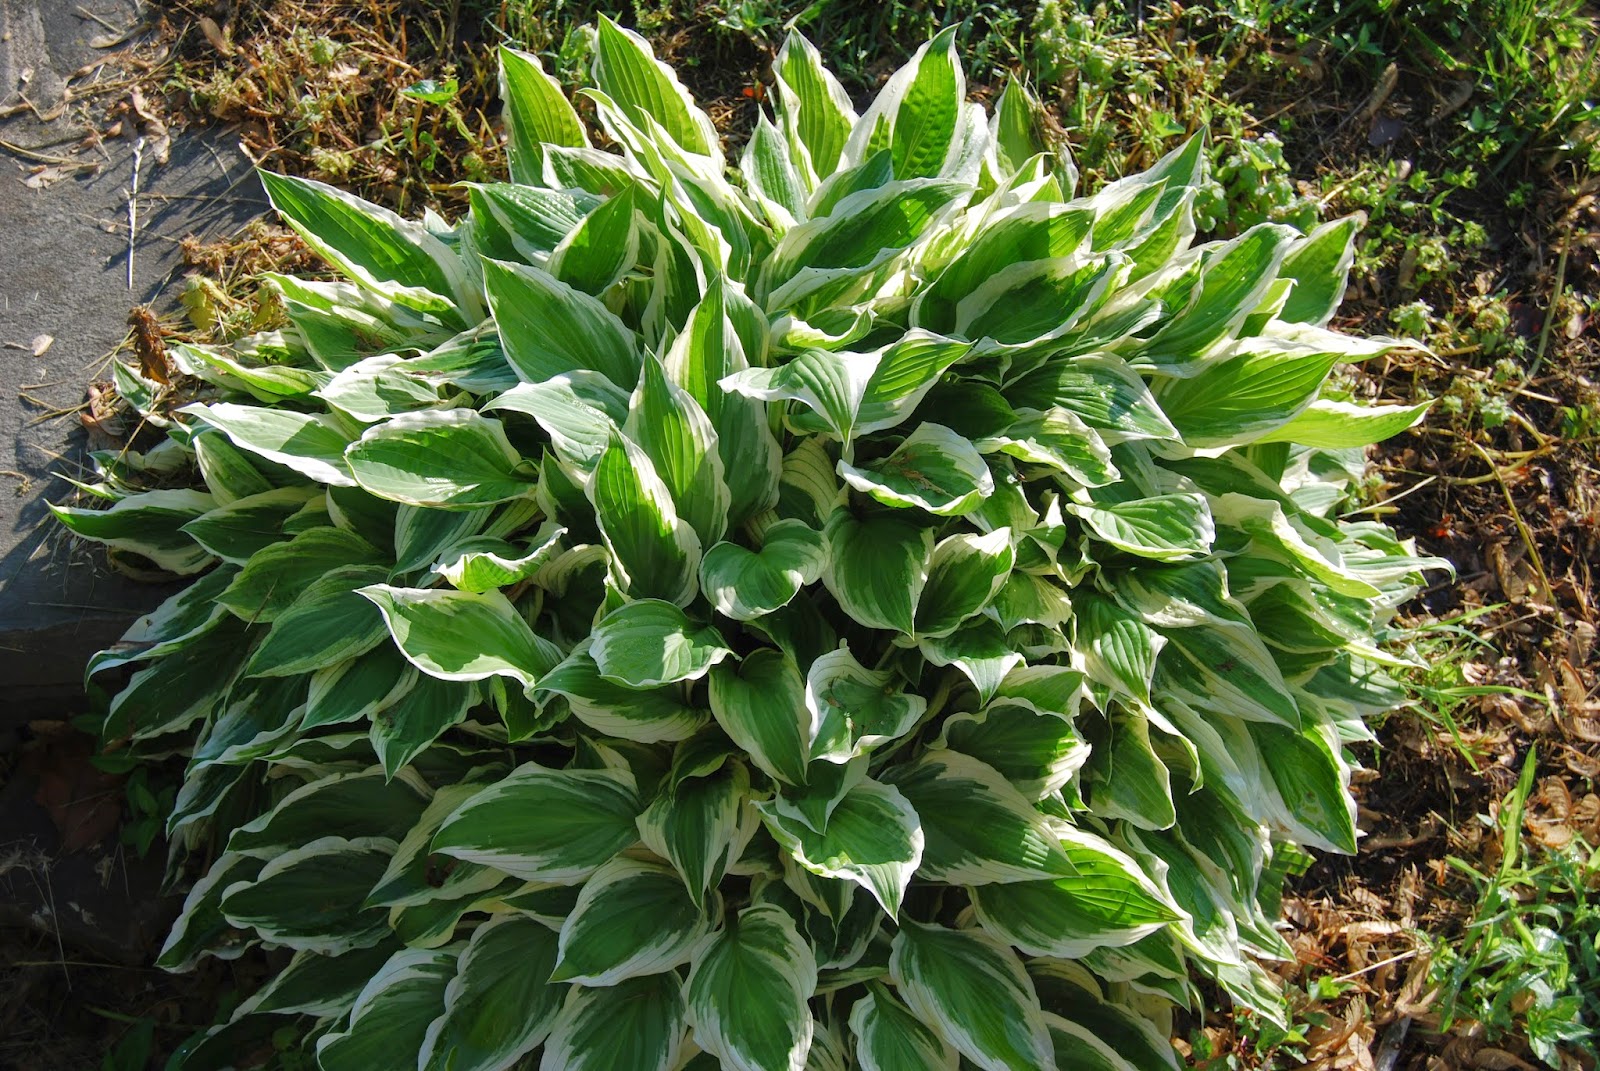
Hosta. So fresh this time of year.
Red Winter Kale - going to seed
One of the new 4x12 garden beds
We added three 4x12 raised garden beds in what used to be the swingset area for the kids. The pea gravel was existing as that was the base for the play area.  This bed contains heirloom tomatoes, basil, garlic, onions, direct sown yesterday - beets and purple carrots. Marigold edging. As you can see above, and below....I still have some "spring cleaning" to do around the yard.  

I have another row of raised beds alongside our pool deck.  Currently planted: lettuce bed, ruby and neon chard, potatoes, 4 standard tomatoes, 2 cherry tomatoes.
The lettuce is currently perfect.
 Picking from outside leaves prolongs harvest.
Peppers beginning their hardening off process
Pond area - prior to spring clean up
Rhododendron is past its peak bloom.
Well, that's the pretty, and not so pretty happening in the garden today.  I plan to continue posting updates on the garden throughout the growing season.  I hope you will enjoy following along.

I am participating in the Garden Tour 2015 hosted by Beth at More Than Oregano. Click on icons below to Tour or "Hop" over to view what's growing elsewhere.

What are you Growing?
If you would like to participate as well, click on the text below that says, "You are next." Follow the directions to link-up your post and share it along with the rest of us.  If you would like to show the entries on your own blog, after you've linked up, click "Get the code" and follow directions there.

Friday, January 23, 2015

Go-To Winter Soup - Warms you from the Inside Out

Fresh  Garden Vegs & Nice Spice

Chicken Sausage Soup
By Alison Rolen

This soup was created to be a low-carb soup for myself.  Everyone in the family liked it, so it has become a family favorite.  All ingredients are fresh, has a nice spice to it, and makes a beautiful presentation, especially when garnished with fresh, shredded Parmesan. Just as good the following day(s). To make gluten-free, check sausage and broth labels.

1 lb bulk sausage – Jimmy Dean has good flavor and acceptable fat
4 cloves garlic – minced
2 tsp ground cumin
1 tsp smoked paprika
¼+ tsp cayenne red pepper
1 large Vidalia or sweet onion – diced
1 c. diced sweet red/orange pepper**
3 stalks celery – diced
1 c. sliced carrots
2 c. shredded and chopped cabbage
2 – 14.5oz cans diced tomatoes (or 1 quart home-canned tomatoes)
1 - 32oz box chicken broth (or 1 quart home-made stock)
If you have any reserved juice/stock from cooking chicken, add that as well
4 c. pre-cooked, cubed chicken – I use mostly, or exclusively, dark meat*
1 bunch green onions – sliced, including greens
¼ c. chopped fresh Italian parsley
Additional salt and pepper to taste

In large stockpot:
  1. Add minced garlic to pot.  Add and Brown the sausage, breaking up into small pieces as it cooks.
  2. Drain off only excessive grease (some is needed to cook veggies).  Add spices to top of sausage: cumin, paprika, red pepper.  Stir, coating sausage well.
  3. Add in: onion, celery, carrots, cabbage – stir to incorporate seasonings over all, cover and cook about 10 minutes to begin to soften the vegetables. 
  4. Add in: all chicken broth, tomatoes including juice, any/all reserved juice from cooking chicken, add some water if more liquid is needed.
  5. Cover and bring to a simmer.  Cook until raw vegetables are desired softness – about 1 hr. total.
  6. Add in cubed chicken and green onions.  Simmer (do not boil) about 10 minutes to heat chicken through. 
  7. Taste broth and adjust red pepper, salt, and pepper to taste.
  8. Add in chopped parsley, simmer for 5 minutes more, serve.

 Garnish: fresh shredded Parmesan cheese to top bowl

Variation:  I have also added in greens (kale, chard, or spinach) - raw with vegetables, or with chicken if pre-cooked (unseasoned)


*I bake 2 chickens, serve for dinner 1st night, then remaining white meat goes to chicken salad, dark meat here.  
**Sweet garden peppers are chopped and frozen in 1c portions ready to drop in this soup

Friday, January 9, 2015

Seed Catalogs...where do I start?

Before I pick up my first catalog, I review my past year.  I am looking for places (plants) I can improve upon, items I didn't have enough of, things I wish I had grown (based on my current cooking and preserving).  

This past year: most things did well.  My first year at making salsa, left my family wanting even more.  In fact, all the "hot" items I made and canned were family favorites and they have overwhelmingly asked for "more hot peppers."  My canned mixed veggies were not, however, a hit and I will not be making them again.  I, personally, like pickled beets so as a treat to myself, beets are added to the list.

After I make a preliminary assessment of what is needed for the next growing season, I then take an inventory of my current left-over seeds.  

Seeds will keep for several years if kept dry and cool.  I keep mine in a plastic "shoe box" with some desiccant packets (the kind you find in shoe boxes).  This has served me well for years.  Most times when I purchase seeds, I have more than I can use in any given growing season.  Therefore, I have many packets I use year after year, only replacing them when they get low or after 3-4 years.  

After all that is done, my list is made of what I need and I begin from there.  

Why do I take all this time and planning?  I am like a kid in a candy store when that first catalog is opened.  I begin to circle item after item and end up with a list if items that I could never plant and take care of, let alone, afford.  Doing these things helps to keep me "in check." 

Now, true confession.  In the process of writing this post, I jumped on the opportunity for "free shipping" from a company I purchase some of my seeds from.  What do you think happened?


Homeschool: planting a different kind of seed

I homeschooled my four for 13 years.  I had those wonderful "bluebirds chirping around my head" moments and those "small ship being tossed by a raging sea" moments.  If you homeschool, or if you are considering it, I want to extend my "olive branch" of knowledge and encouragement.

January is one of the "tough months" for homeschoolers.  The holidays: excitement, vacation, play time, "sugar", is over and it is back to work.  A struggle for student and parent alike.  The bleak, grey days don't help.  It was in these days I would change gears a little and focus on a little less "book work" and more on covering the topics through projects, experiments, dioramas, and games to supplement math assignments.  Mind you, not all at once, but nonetheless used as a means to add some creativity to the work and help ease the transition back into the "grind" so to speak.  

So, dear homeschooling parent.  Keep up the good work and your spirits.  Remember that homeschool isn't about "bringing the classroom into the home" but an opportunity to encourage your child(ren) toward a lifetime quest to learn. When was the last time you wondered about something and "googled" it to find an answer.  That is the love of learning you want to pass along.

Happy homeschooling. 


Thursday, October 23, 2014

Swiss Chard

After some trial and error, I am sold on growing Swiss Chard! It is easy to grow, tasty, and "pretty". There are several different varieties and they may be used in a border garden for their decorative appeal as well as a wonderful, edible green. It has become my summer "spinach."

Ruby Chard - in whiskey barrel planter
At first, I followed several different recipes I found online.  They were all ok. Each was an "acid" base recipe, using either lemon or vinegar...  I had a season's worth of harvesting still to do and my family wasn't "sold" on this new addition to our table.  

It occurred to me that most people describe the taste similar to either spinach or asparagus.  With these vegetables, it occurred to me that I like both sauteed with butter...sweeter. Voila!  Success for our household.  

Suggestion 1: "Spinach"
I cut the main stems out and (gasp) discard - compost
I then chop and briefly saute the leaf portions as I would fresh spinach.  I use real, salted butter.  As with spinach, you need quite a lot of fresh product as it cooks down a lot. Salt/Pepper to taste.
This is the main reason I grow chard - to have "spinach" all summer in this way. I also cook it this way if the chard has "gotten away from me" and I have a lot of it.  I have used it in quiche, scrambled eggs, soup, and plain as a side.

Suggestion 2: Chard-whole
The stem portions need to be cooked longer than the leaf portions:
Remove the main stems making a pile of stems, and one of leaf portions.
Chop stems finely.  Chop leaves roughly.
Saute the stems first until softened (in your flavor of choice: olive oil, butter, whatever), then add in the leaf portion and saute until wilted/cooked. Salt/Pepper to taste.
My Family favorite:
Cook a few pieces of bacon until tender but not crisp, add in 2-3 cloves minced fresh garlic, saute till golden.  Add in chard stems and a little olive oil or butter if dry.  Cover and cook until stem pieces are tender.  Add in leaf portions and continue to stir and cook until wilted.  I sometimes top with grated or shredded Parmesan cheese. 

Suggestion 3:  Use in place of other greens
Pretty much any way you use other greens, you can replace chard for something different: soups, vita-drinks, sweet/sour wilted "spinach" salad, etc.  Basically, if recipe calls for spinach, I use only the leaf portion.  If it calls for kale or other such, use leaf portion and some or all of the stem (be sure to pre-cook stem first).  I love to add some to soup.  It is a beautiful color-I precook it separate first then add it in. 

So, my advice is to start with your favorite way to cook and use spinach and prepare the leaf portion in that way.  Then try it in a few recipes that use spinach.  After that, try it whole. And, by all means, try growing some.  You can even plant it in containers, along your flower bed as a border, or save some space in your vegetable garden for it.  Buy transplants or start from seed.  The key to harvesting is to pick outside, lower leaves and not more than 1/3 of any given plant.  It will continue to grow and produce all season long and may even over-winter.  

Rainbow Chard in raised garden bed - spring
same crop - mid October - still producing

I hope I may have encouraged you to try Chard and perhaps even grow it in your own garden.  If that is the case, I'd love to hear from you.  

Sunday, October 12, 2014

The Fall Garden

It's now officially fall - by the calendar and the weather.  It is my favorite time of year. While not quite sweater weather,it is a wonderful break from the summer heat even though this summer was very mild. 

I have noticed that the garden is much happier with the break in the weather as well.  My pole beans took on a new life and began a whole new crop as well as the bush beans. While I didn't plant a lot of them, I was able to not only continually eat them fresh but put some away in the freezer for some future meals - one bag is specifically marked "Thanksgiving."

Fall plantings: broccoli, lettuce, kale, pole beans still producing

I direct-sowed some lettuce, spinach, and two types of kale seeds.  The lettuce and kale are doing well, the spinach came up then was hit with a couple weeks of heat which I think did them in.  They never grew and I gave up.  I purchased and placed broccoli plants in their place.  I also purchased a pack of brussels sprouts.  The brussels have been in for about a month and are looking good.  I can see teeny sprouts forming at the base of each leaf.  This is my first year with brussels and I am so excited!  I have been battling cabbage worms or as I call them "cabbagepillars" that are trying to eat things before I can.  I have to make a point of checking everything at least every other day.  Those "pillars" can munch a plant beyond recovery in 2 days.  I have already placed the hoops over two of the garden sections.  This is covered in plastic and become my little "greenhouse" when frost and colder weather is predicted--extending the season for some of my crops.  

Brussels sprouts with loaded sweet pepper plants behind
Look closely and you will see several cabbage worms-in all sizes-tricky

I am working on picking the last of everything left on the plants and pulling them up. They then are gathered and thrown into the chicken run for the girls to work over.  Once they are done, there is nothing but bare sticks or stalks that are then composted, burned, or bagged for recycling - depending on what it was.  They love to see me coming with an armload of "goodies."

October 8 harvest:
3-1/2lb beans, 4lb hot peppers, 3-1/4lb sweet peppers, chard, dry beans for seed

I leave my flower seedheads alone for fall.  I do this for a few reasons.  First, I love to watch the goldfinches land and eat the seeds from the coneflowers and black-eyed susans plus there is something about those little brown spikes that is appealing to me...the color? the shape? I'm not quite sure.  Leaving your flowers go to seed also allows for the possibility of reseeding for even more lovely flowers next year.  

Leave the seedheads for the Goldfinches. 

This past summer, I discovered some "volunteers" under the bird feeder.  While I pulled many of them, I left a few that were in a spot that could hold them.  After of a summer of growth, I have a nice little stand of sorghum!  Pleasant surprise.  

Sorghum stand - from sprouted birdseed.

My tomatoes are pretty much finished for the year - we had our last BLT of the year this weekend.  I still have a lot of peppers - both sweet and hot - to pick yet.  That is a good thing since we eat a lot of peppers through the winter.

I still have a lot of garden "to-dos" ahead of me for the fall... 

Monday, August 11, 2014

Refrigerator Pickles - Spicy Dill Spears

After an especially bountiful cucumber harvest, I set out to find a dill variety refrigerator pickle.  I had tried my hand at canning dills, but they always turned out too soft for our liking.  Furthermore, we are not a "sweet pickle" family so the standard refrigerator pickle with vinegar and sugar was not for us.
Refrigerator Pickles in re-used jars
This is the final recipe I use, adapted from one I found online* (see bottom).  My family likes things a little on the spicy side, so these were perfect.  Now a requested item.  

Brine: 
2 cups water
1 3/4 c. white vinegar
1 1/2 c fresh dill "fronds" (leaves)
scant 1/4 c white sugar (or less)
8 cloves garlic, halved
1 1/2 Tbsp. coarse salt
1 Tbsp. pickling spice
1 1/2 tsp dill seed
1/2 tsp red pepper flakes (plus)
fresh dill flowers (to place 1-2 in each jar)
1/2 tsp alum (for crunchiness)

(12) long pickling cucumbers cut in spears
Either use canning jars, or I reuse jars from dressing, salsa, other pickles, etc.  

Note: I just use the cucumbers that I have and make more brine if I need to.  I also like "dilly beans" so if I have some, I make a jar or two with string beans.

1.  In a large pot: combine ingredients for the brine, heat just to dissolve the sugar & salt.
2.  Cut cucumbers into spears.  Remove ends from beans - leave them whole.
3.  Place "dill flower" into bottom of each jar along with 1-2 pieces of garlic.
4.  Pack the spears into the jars fairly tightly.
5.  Ladle brine to cover pickles, include spices.  
6.  Divide dill evenly through all jars topping and stuffing it throughout.  
7.  (To taste) Add another "sprinkle" of red pepper flakes to top of jar.
8.  Seal with lids.  Refrigerate for 10 days before eating for best flavor.  Use within 1 month.
I also invert/shake the jars several times within the 10 days to ensure even distribution of flavors.

*Adapted from "Spicy Refrigerator Dill Pickles" at allrecipes.com

Saturday, August 9, 2014

Wanna #chat?

Wanting to connect with some like-minded individuals on Twitter, I have found there are several chat forums throughout the week.  After missing several, I decided to make a listing of some of them. These are all garden related, and I am well aware that it is not a complete listing.  It may be added to in the future.

All times listed are Eastern Time:

Monday   2pm   #plantchat
               9pm   #gardenchat
Tuesday  2pm   #treechat
               9pm   #pollin8rchat
Weds.     2pm   #landscapechat
               9pm   #seedchat
               9pm   #rosechat 
Thurs.     2pm   #herbchat
Fri.          2pm   #groundchat

Hope this helps you make some connections!  
Chat with you soon.

Wednesday, July 9, 2014

Hot Pepper Jam

Our all-time favorite appetizer is Homemade Hot Pepper Jam over softened cream cheese. Serve with thin pretzels or other cracker of choice.  It is a wonderful blend of heat and sweet. 

Personally, I use a mix of jalapenos and hot cherry peppers for a beautiful mix of colors.  If it is early in the season and the peppers aren't as hot as I like, I have also added in several cayenne peppers for a little added heat.  

My jar of choice is the 1/2 size (4oz) jelly jar.  It is the perfect ratio:  one full jar to one block of cream cheese.  These jars are also given out on Christmas or other occasions as our take-home gift to guests. 


Hot Pepper Jam
Adapted from the Ball Pectin recipe:     yield: 12-4oz, or 6-8oz jelly jars
Use Gloves!
Another caution: rinse/wash all peppers before you cut them.  Do not rinse after cut.
4c. Fresh-picked, Prepared (finely chopped) hot peppers, seeds discarded*
    *I use a mix of Jalapeno and Hot Cherry, I keep in a few seeds from each pepper, and chop using a small food processor - to finally measure a full 4c. prepared peppers 
1c. cider vinegar
5c. sugar (do not substitute)
Pectin - 6 Tb. from bulk jar (or 1 box) Original/Classic

1.  PREPARE boiling water canner, jars and lids.  Measure out all ingredients.

2.  COMBINE prepared peppers with vinegar in a 6-8qt saucepan (you need the large surface area).  Gradually stir in Ball Original/Classic Fruit Pectin.  Optional: Add up to 1/2 tsp butter to reduce foaming.  Bring mixture to a full rolling boil that cannot be stirred down, over hight heat, stirring constantly.

3.  ADD entire measure of sugar, stirring to dissolve.  Return mixture to a full rolling boil.  Boil hard 1 minute, stirring constantly.  Remove from heat.  Skim foam if necessary.

4.  LADLE hot jam into hot jars, one at a time, leaving 1/4 inch headspace.  Clean rim and threads of jars using a clean, damp cloth to remove any residue.

5.  CENTER hot lids on jars, allowing sealing compound to come in contact with the jar rim.  Apply bands and adjust until fit is fingertip tight.

6.  PLACE filled jars in canner.  Be sure water covers tops of jars by 1-2 inches.  Add hot water if necessary.  Place lid on canner. Bring water to a gentle, steady boil.

7.  PROCESS jars for 10 minutes, adjusting for altitude (refer to chart in pectin).  After processing is complete, turn off heat and remove lid.  Let jars stand for 5 minutes.

8.  REMOVE jars from canner and set upright on a towel to cool, undisturbed, for 12-24 hours.  Bands should not be retightened as this may interfere with the sealing process.  After cooling, test seals by pressing the center of each lid.  If a lid does not flex up and down, it is sealed!  If it is not sealed within 24 hours, refrigerate immediatedly for up to 3 weeks or reprocess for the full length of time using a new lid.  

9.  CLEAN sealed jars.  Remove the bands.  Wipe jars and lids with a clean, damp cloth.  Label and store in a cool, dry, dark place up to 1 year.

I make several batches of this jam every year so in addition to labeling with the year, I indicate the batch number as well using inconspicuous "dots", abc, 123, or the like.  Each batch will turn out with a slightly different "hotness" level.  I keep track and use accordingly (eg: the hottest batch is noted and saved for "special" occasions). 

Do you have a favorite variation of hot pepper jam?


Thursday, June 12, 2014

Garden Experiments

Edibles everywhere. That was my goal for this year.  If I wanted color in a garden, I looked for an edible that would fit the bill.  I am sure there is much more out there, but it is a start.  Everything was started from seed.  

The experiments for the year:
  • Tri-color pole beans on one trellis with rattlesnake and purple pole beans on the other.  To be picked young for eating. Question: How with they look and will my family eat them?
Experimental pole beans - color? taste?
  • Scarlet runner beans were added to the edges of both of those trellises as a border of color.  These were purchased for the flower color and then, hopefully, dry and eat the beans as well.
  • The scarlet runner beans were also added to two trellises in a focal garden on the side of the house
  • Ruby Swiss Chard was added along the front edge of another garden to add a nice contrast of color to the rock border.  Picked small, chard is very tender and cooks up and tastes like spinach.
  • Sweet 100 cherry tomatoes are on two focal trellises to climb and add a pop of red and green. 
  • Red Sails lettuce was placed along the front border of my little pond on the north side of the house - hoping it will last longer there with some shade and coolness; it is a pretty contrast of color to all the green there as well.
  • Lettuce surrounds front border of pond
  • An assortment of hot peppers were grouped along south-facing brick wall.  They are supposed to like it hot, and that is the hottest spot of the yard.  They are also a red fruit which will be a pretty pop.
  • Parsley and basil line a garden path.
  • The biggest project was the addition of two 4x12 raised beds built within the confines of the old swingset area.  These are planted completely in vegetables.

Watch for a post on the creation of these beds
The remainder of the vegetable and flower gardens are pretty much status quo.  I have several dedicated garden beds, both raised and "in the ground".  I also have a patch of garden surrounded by the driveway which is predominately perennials but I plant my jalapenos along the perimeter there for the heat.  Along one of my fences, I plant a few tomatoes in buried pots filled with compost; they are trained along the fence for support. A whiskey barrel next to the house has an early tomato and 4 Swiss chard.
Keep picking the chard to keep it small and producing